The best way to learn how something works is to roll up your sleeves and dive right in. In this spirit we have created a quick tutorial to help you become familiar with the process of getting a new product into the IMVU Catalog.
 |
| Create a T-Shirt Product |
| In this tutorial you are going to learn to Derive from an existing product, open up the Create Mode Editor, swap a texture, and resubmit it as your own product. |
|
|
|
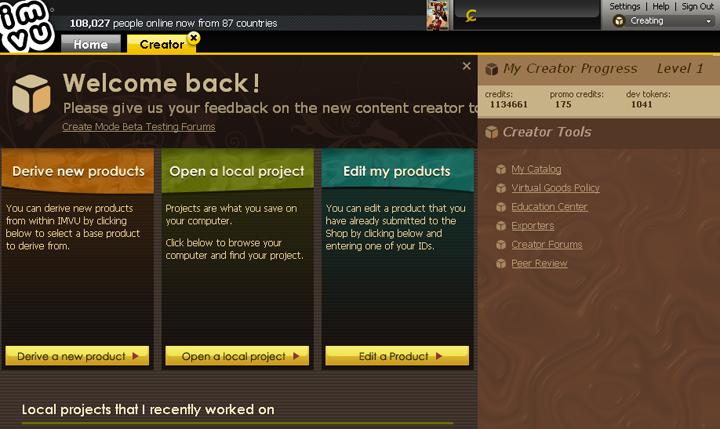
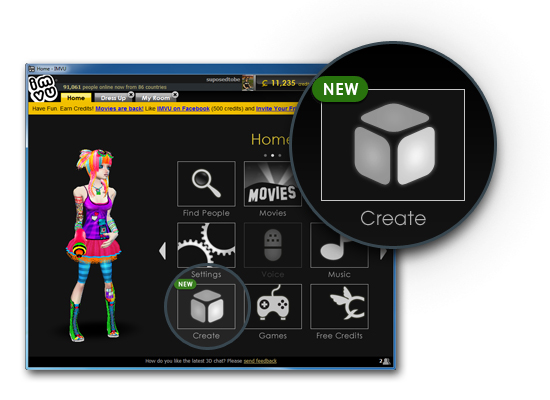
To get to Create Mode, click on the Create button located on your IMVU main page. You may have to click on one of the navigation arrows on the right or left to find it. |
 |
|
TWO: Find the "Derive a new product" button |
Every time you create a new product you need to Derive it from an existing IMVU product first. To get started you will need to click on the Derive a new product button on the left side of the Create Mode screen.
|
| THREE: Enter a Product ID Number |
The Derive a new 3D Product window will appear. This is where you will specify the product you will base your new product on. This window gives you a list of base products for you to derive from, but for our exercise, we are going to manually enter the number for “Tutorial Tee” Product No. 1792679, to load the product you will be altering. Type in the number and click the Derive button. |
FOUR: Understanding the Create Mode Editor |
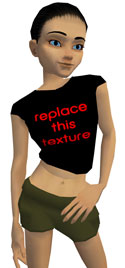
| Next, the above window will appear. This is the Create Mode Editor, and this is were all IMVU products are assembled. On the left side is the 3D preview window where your avatar appears wearing the Tshirt product you are going to derive from. On the right side of the window are the various tab functions of the Editor. For this tutorial we are only going to change the Texture on this t-shirt itself, so we will remain in the Mesh TAB to do all of our work. |
| FIVE: Introduction to the Mesh Tab |
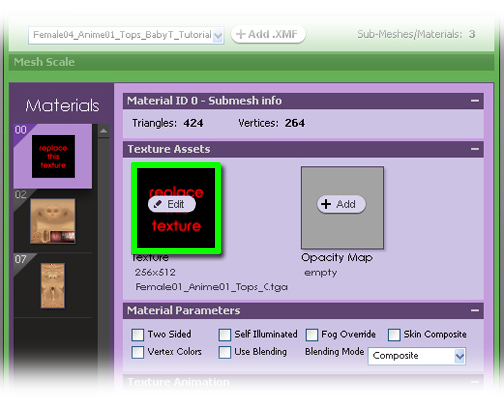
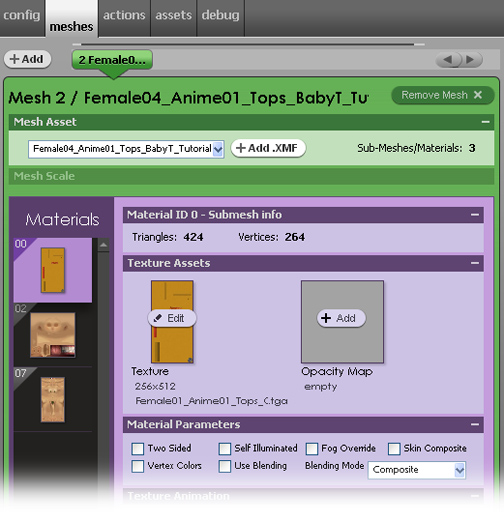
When the Create Mode Editor first opens your Tshirt product it will open the Mesh Tab by default. The Mesh Tab is where you can load your product's Mesh and Textures (Materials). For this tutorial we will only be "swapping" one of the textures in the Materials column with a new texture. To swap a texture you will need to click on the Material preview image on the left to access the Material properties on the right. The material properties window will allow you to swap, animate, and adjust settings that will effect how your texture will appear on your product.
NOTE: For this tutorial, we are going to change only the first of the three textures displayed within the Materials column on the left of the Tab window. To learn more about applying multiple textures, and alpha maps, be sure to visit the Tutorials on Texture Mapping. |
 |
| Now that you have opened the Mesh TAB you are ready to replace the Derived texture with one of your own. We have supplied you with several texture options, which you can download here, but we encourage you to try applying a design of your own:
If you choose to make your own design it will need to be 128 pixels by 128 pixels square and include a graphic or logo in the lower center of the texture, surrounded by a solid color. Patterns will not apply properly to the t-shirt mesh.
|
| Now its time to change the texture on the Tshirt. If you want to use one of the textures we provide, download them to your desktop. Then, click on the texture picture in the Create Mode Editor and browse to the example textures you have just downloaded, or to your own original design. |
| SEVEN: Update Your 3D Window |
|
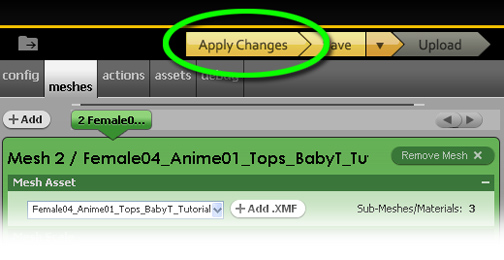
Once you've loaded your new texture, please click the 'Apply Changes' button at the top right corner of the Create Mode Editor. This will update the textures applied to the Tshirt Mesh. |
| Once you have entered and applied the texture you wish to the Tshirt Mesh, now is the time to Save your work. To do this, choose Save As from the Save menu (arrow button next to Save will allow you to access the Save As button). Here you can give your Tshirt project file a unique name that will make it easier for you to find later if you need to make further edits. |
| NINE: Upload Your Product |
|
Once you have Saved your new product, go to the top of the Create Mode Editor window and then click the button labled "Upload" |
| TEN: Edit Product Information |
When you hit the 'Upload.' button, a web page will appear wherein you can edit multiple fields:
· Choose where in the catalog your product will live
· The Product’s name
· A catalog image for your new product *
· The Product Description (you can add HTML tags to this)
· Product rating (See IMVU's Virtual Goods Policy for more information)
· Product price
· CFL file – for this section, just copy and paste the URL provided just above the edit box.
TIP: If you haven’t saved your CFL, this URL will not appear.
· Derivability – Allows others to make derivations of your work. If they sell, you get more money.
. Tags (helps search engine point people to your product in the Catalog)
Fill everything out and press the Submit button.
* NOTE: A catalog image is necessary to submit a product to the IMVU catalog. Catalog images are 100 pixels wide x 80 pixels tall and should represent the product you are trying to sell. This is easily achieved by simply taking a snapshot and editing it in your favorite image editing software.
|
 |
ELEVEN: Final Step... PUBLISH! |
Congratulations! You have just submitted a product to IMVU!
Submitting a product to IMVU means that you can now load your product into your own 3D window and try it on with the other products in your Inventory. This will allow you to adjust your product until you are happy with it. When you are ready, you will be able to Publish your product and it will go through a Peer Review before being added officially to the IMVU Catalog for others to see and purchase. |
|


